Admin V05
Contents
Introduction:
Amrita Career Portal is an indigenous career guidance portal eclectically designed to help job seekers to find their careers at Amrita. Job seekers can avail of jobs by registering themselves in this portal searching and applying for different jobs which match their profile. This document illustrates the admin role in Amrita Career Portal. Here we cover the following topics in detail
Job Administration
Create New Job
Edit / Delete a Job
Search for a job
Dashboard
View descriptive details of a Job
View the candidate list with the process status of a particular job
View the profile of a candidate who has applied for a job
Enable Personal Information Sheet Form for a candidate to Fill in details
Schedule Interview
Publish Interview result
Getting Started:
To access Amrita Career Portal
Open an internet browser (Recommended to use Google Chrome)
Type https://my.amrita.edu/ and click enter
Login with your amrita email id and password.
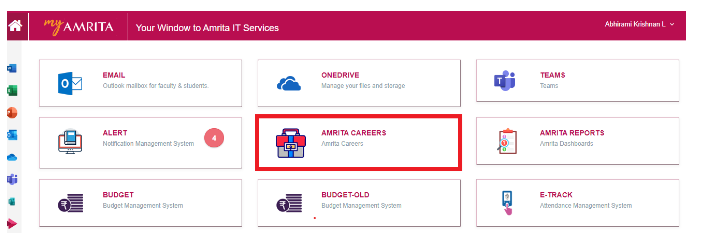
Click AMRITA CAREERS
Job Administration
Create New Job:
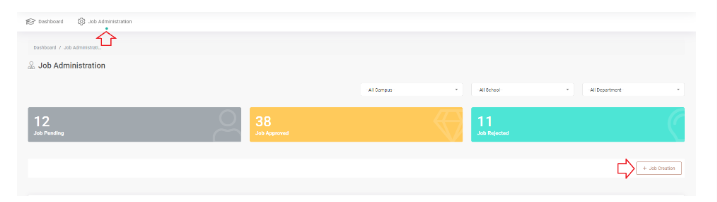
Click Job Administration in the top menu.
Click on the Job Creation button at the right side of the page.
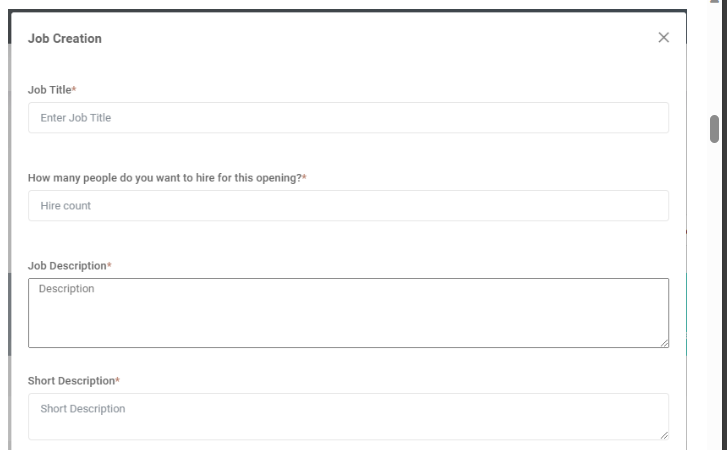
Job Creation window wi
ll be opened.
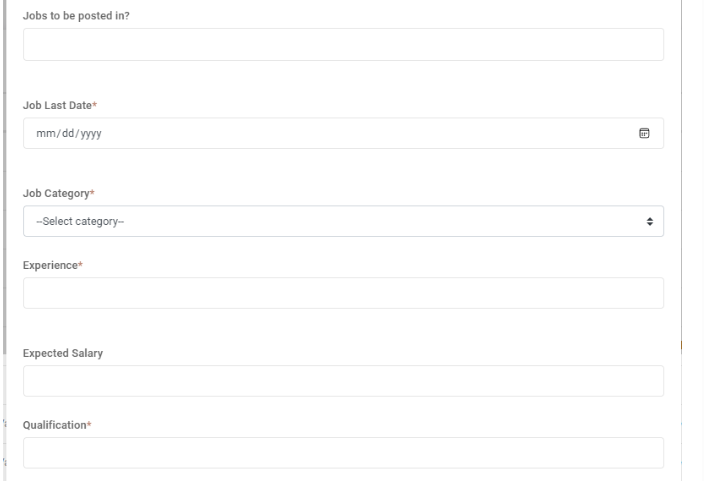
Fill in the following details
Enter a job title
Add the number of people you want to hire for this opening
Add job description
A Short description of the job
Where are the jobs to be posted other than the Amrita career portal?
The last date till the job can be applied
Select the category of the job
Experience required for the job
Approximate Salary package range
Minimum qualification required for the job
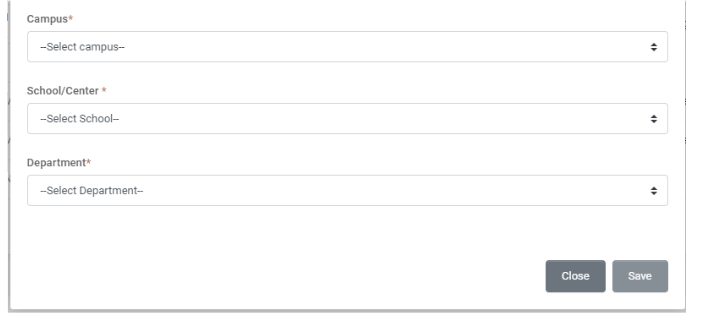
Select the Campus, School, and Department from the drop-down under which the Job will be created.
Click the Save button.
Note: Admin will only be able to create /edit/view jobs under the campus to which he/she is assigned.
Created Job will have to be approved by the dean for appearing on the candidate side.
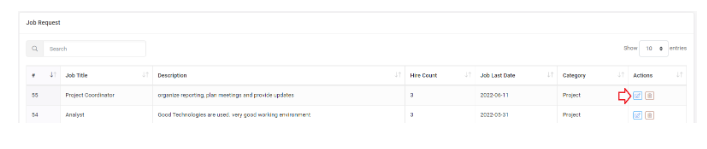
Edit or Delete a Job request
Admin can click on the edit icon to edit the respective job request in the table. Another way to edit a job is to click on the job name to open the job details page and click the edit button there.
Admin can delete a job request by clicking the delete icon near to it.
Search for a job
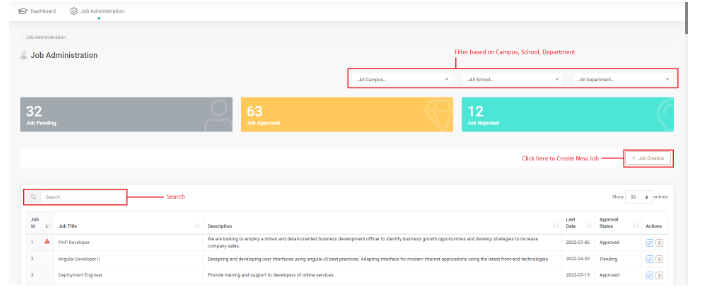
Apart from this, the admin will be able to search for a job and filter the list based on campus, school, and department from the Job Administration page.
From the Job administration page admin will be able to view the count of Jobs pending approval, jobs approved, and jobs got rejected and filter the list by clicking on the count displayed.
The alert symbol (red exclamation mark) near the Job Id indicates that the job got expired.
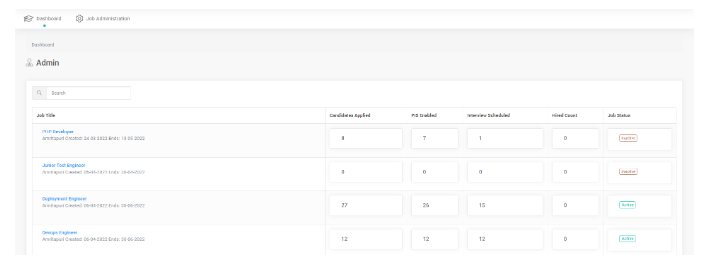
Dashboard
From the dashboard, the user will get a glimpse of the quantitative analysis of each job.
The Job table in the dashboard consists of
Job Title - This is the title of the post.
Candidate Applied - Clicking on this count displays the list of candidates who applied for this job.
Personal Information Sheet Enabled - Clicking on this count displays the list of candidates who have View Personal Information Sheet enabled for this job.
Interview Scheduled - Clicking on this count displays the list of candidates who has Interview Scheduled for this job.
Hired count - Clicking on this count displays the list of candidates who are hired for this job.
Job Status - Shows whether the job is currently active or inactive. Active means it is available for the candidates to apply. Inactive means this job is not currently available for the candidates to apply.
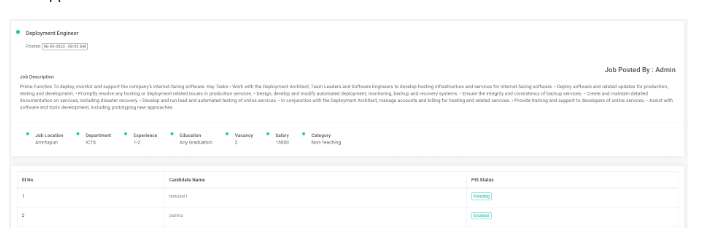
To View descriptive details of a Job
Click on the Job title to view the descriptive details of the job and the list of candidates who applied with the status of Personal Information Sheet.
To View the candidate list with the process status of the candidate's application for a particular job
Go to Dashboard
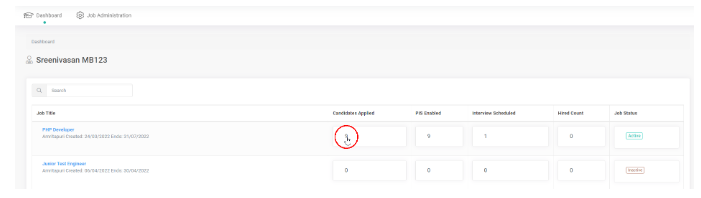
Click on any one of the job counts from the dashboard to view the list of candidates with process status based on the category you clicked to apply.
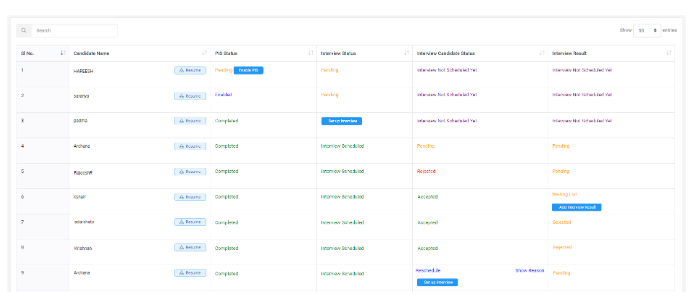
The above image shows the stages of different candidate's job applications. Let's see what stage each candidate is
Candidate has applied for the job, now admin needs to enable the Personal Information Sheet form for that candidate to fill in the details.
For this candidate, Admin has enabled the Personal Information Sheet form to fill details.
Here candidate has completed filling the Personal Information Sheet form details and the admin needs to Schedule an interview.
Here Admin had scheduled the interview and waiting for confirmation from the candidate.
This candidate has rejected the interview notification.
This candidate has accepted the interview notification. The candidate has attended the interview, but the admin has put the interview result as waiting list.
Here for this candidate admin has published the interview result as Selected.
Here this candidate got rejected in the interview result.
This candidate has requested to re-schedule the interview. Admin can re-schedule the interview depending on the availability of the slot if required.
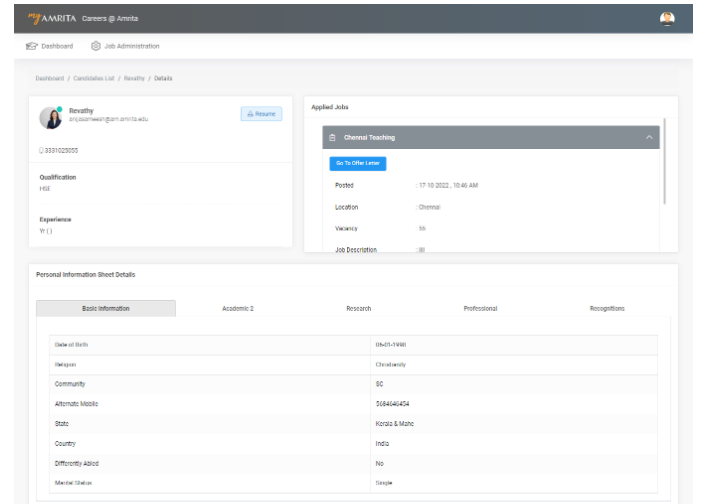
To View the profile of a candidate who has applied for a job
Go to the dashboard
Click on Candidates Applied count against a job to open the list of candidates who have applied for that job
Click on the name of the candidate
A page with a detailed view of the candidate's profile will load.
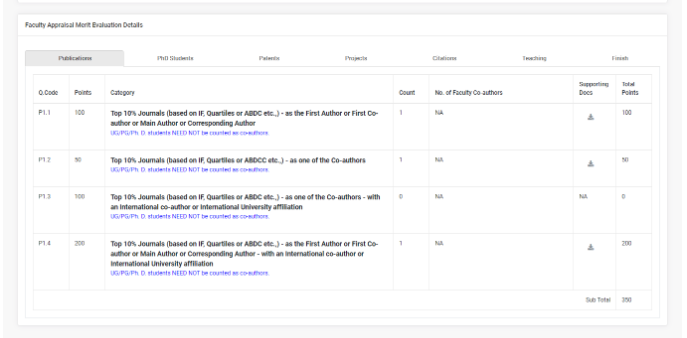
This page consists of the contact details of the candidate, a list of jobs the candidate has applied for, the Personal Information Sheet form details, and the Faculty Appraisal Merit Evaluation. The Faculty Appraisal Merit Evaluation form is applicable only for teaching category jobs.
Enable Personal Information Sheet form for a candidate
Once a candidate applies for a job, the admin needs to enable the Personal Information Sheet form to fill in the required details. To enable the Personal Information Sheet form
Go to Dashboard
Click on Candidates Applied count against the job for which the Personal Information Sheet form needs to be enabled.
Click on Enable Personal Information Sheet button against the candidate name to whom the Personal Information Sheet form needs to be enabled.

The Personal Information Sheet form consists of 6 sections. Each section consists of the following details which candidates need to fill in.
Sections | Details Covered |
|---|---|
Basic Information | Date of Birth |
Academic 1 | Have you cleared Under Graduation? If Yes Provide details. |
Academic 2 | Have you cleared UGC NET ? |
Research | No. of Research Project Guided |
Professional | Provide previous Experience information if any |
Recognitions | Whether received any Award / Recognition ? |
Based on the plausible data in the Personal Information Sheet form filled by the candidate, the admin will shortlist and schedule an interview for the candidate.
Schedule an Interview for a candidate
To Schedule an interview for a candidate
Go to Dashboard
Click on Personal Information Sheet Enabled count against the job for which an interview needs to be scheduled.

Click on Setup Interview button against the candidate name who has completed filling Personal Information Sheet form.

A pop-up window opens where you select the interview date, interview time, and mention the venue of the interview. Click Save.
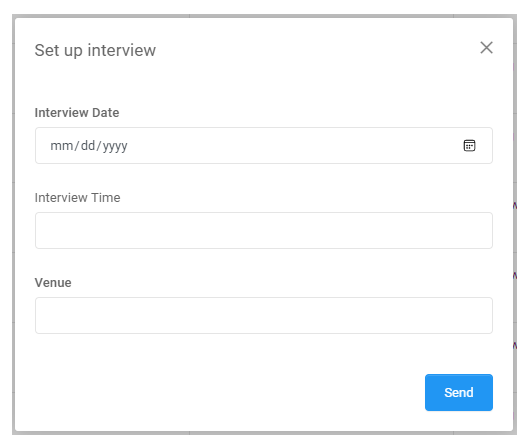
An Email notification will be sent to the candidate regarding the interview. Candidate can Accept, Reject or request to Re-Schedule the interview.
Publish Interview Result
To add the interview result
Go to Dashboard
Click on Personal Information Sheet Enabled count against the job for which the interview result needs to be added.
Click Add Interview Result button against the candidate name to whom the result needs to be added.

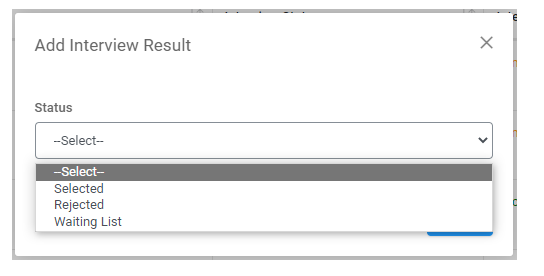
A pop-up window opens where you select the status of the interview result. Click Save.
Interview result can be procrastinated if required by setting the status as waiting list.
Send Offer Letter
To create an Offer Letter
Set interview results as Selected. Click Save.
Offer Letter page will be displayed.
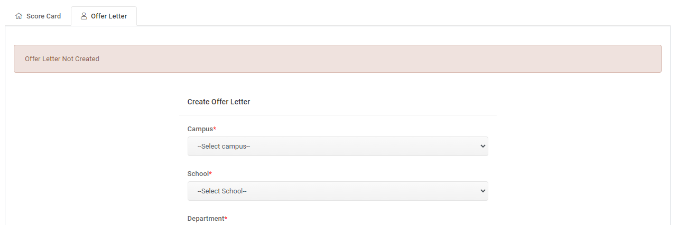
Offer Letter consist of 7 sections. Each section consists of the following details which Admin needs to fill in.
Sections | Details Covered |
|---|---|
Campus | Campus list depends on Admin |
School | Select a school from the list |
Department | Select a department from the list |
Category | Teaching |
Salary Type | Consolidated |
Designation | Select the Designation as required |
Accept On/Before | Set joining date |
Fill in all details. Click Save.
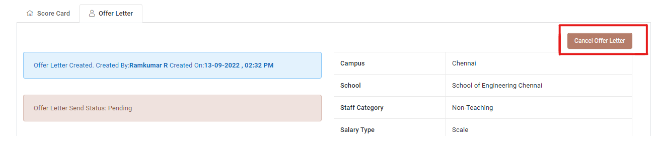
It will direct to Send Offer Letter page.
If Admin wants to edit the offer letter created then Click on Cancel Offer Letter .
Update Email Template as required.
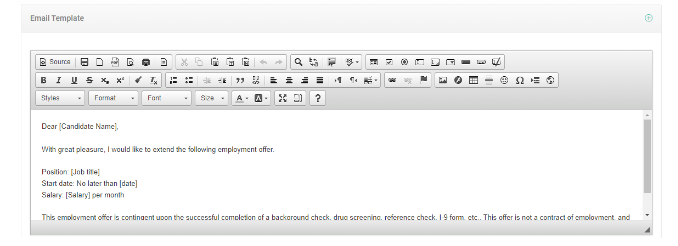
Click on Send Offer Letter.